
Adding a subwoofer to your factory stereo system can give you the extra bass you need to really feel the music. It can also make your car sound louder and more powerful.
In this step-by-step guide, we will show you how to add a subwoofer to your factory stereo system in just a few minutes.
We’ll also share a video at the end of the article that will help you understand the steps better. So, keep reading!
How to Add a Subwoofer to Factory Stereo
Here is a step-by-step guide on how you can add a subwoofer to your factory stereo to deliver high-quality sound and heavy bass in your car. This is an expert installation guide with clear instructions, if you follow them carefully, you should be able to achieve great results.
Materials You’ll Need
To get started, you’ll need some materials to aid your connections. These materials include:
- An amplifier (except if your subwoofer has an inbuilt amp),
- RCA cables,
- Line-output converter (if your amp or factory stereo doesn’t have RCA terminals,
- Inline fuse (at least 50 amps),
- Wiring materials,
- Some basic tools (screwdriver, pliers, knife, tape, and so on),
- Pair of gloves,
- Subwoofer box (optional).
Most times, you may need some other materials in addition to those listed above. The materials you will need usually depend on your particular system and requirements. I advise that you use your discretion in choosing the right materials for the installation.
Facts You Should Know
Foremost, it’s possible to add a subwoofer to your factory stereo without an amp (you may want to consider this if you’re low on budget). But I don’t recommend this. Without an amp, the bass frequencies will be flat and the subwoofer won’t produce a louder output.
Except you’re using a powered subwoofer, get an amp for the connection. This guide explains how to add a subwoofer to your factory stereo using an amp.
Before you start with the installation of any electrical equipment in your car, disconnect the negative terminal wire from your battery.
Also, make sure that the negative terminal wire isn’t in contact with any part of the car. This is important for the safety of both you and your car.
You’ll need to ground the system to prevent dangerous electrical discharges. Get a ground wire and connect it to a metal bolt in the car.
Now, follow these steps to add a subwoofer to your factory stereo:
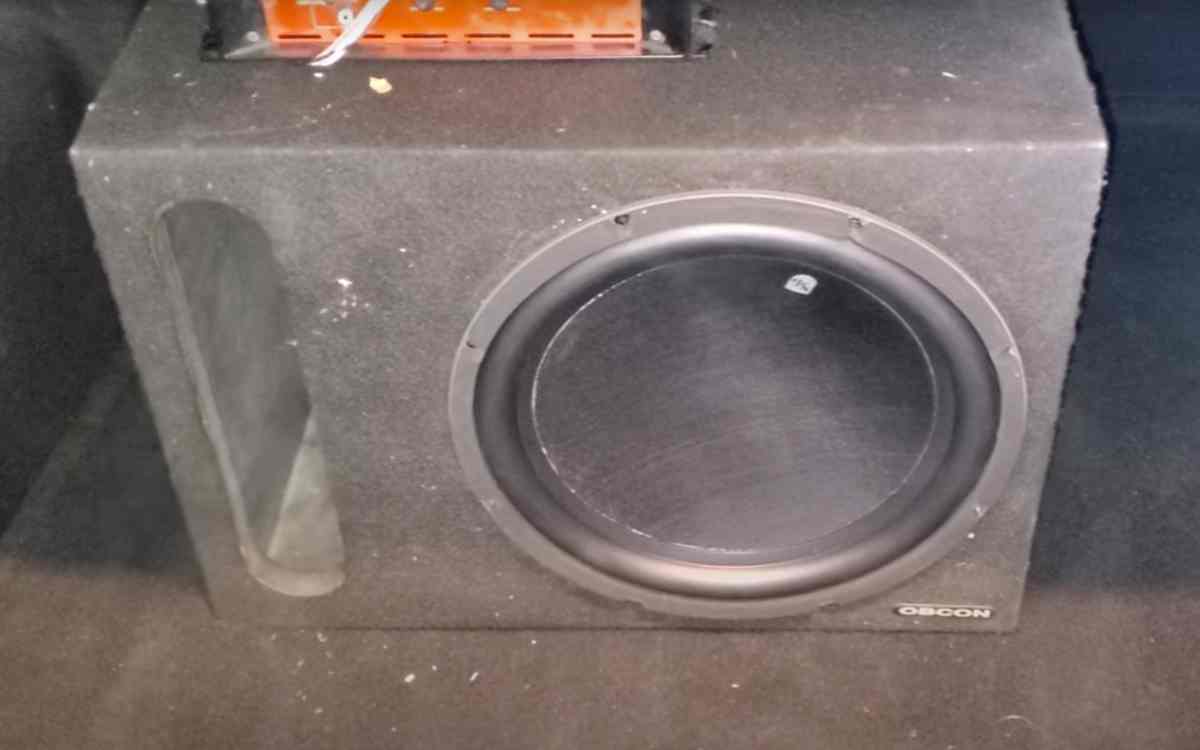
Step 1: Find A Good Place to Keep the Subwoofer in Your Car
This is the first and very important step. Since the subwoofer is a new addition to your car, you must create a space to accommodate it. The space should be large enough to perfectly accommodate the subwoofer, amp (if you’re not using a powered subwoofer), and wiring system.
The subwoofer shouldn’t be too cramped up in the space. A large space makes it easy for you to get to the subwoofer whenever you want to clean, adjust, or repair it. More so, a large space gives enough breathing space that prevents unnecessary overheating.
Therefore, any place you want to keep the subwoofer in your car should have enough space to air out the heat and allow the subwoofer to function well.
Step 2: Connect the Power Wire to the Amplifier
Make sure that the length of the power wire is long enough to handle the connection. Connect one end of the power wire to the positive terminal of your car battery and run it through the firewall into the car. If you’re placing the amplifier and subwoofer in your car trunk, run the power wire to the trunk and connect it to the amp.
You can run the power wire underneath the car carpet to hide it. Make sure that you add a fuse to the connection and that the fuse is close to the battery as much as possible. This is the right way to prevent (or reduce) the chances of short-circuiting.
Please note that if you’re using a powered subwoofer, you’ll connect the power wire directly to the subwoofer. A powered or active subwoofer already contains an inbuilt amp and doesn’t require an external amp.
Step 3: Run the RCA Cables and Remote Turn-On Wire to the Stereo
The RCA cables connect the stereo to the amplifier to provide the relevant signal. Carefully run the RCA cables and remote turn-on wire from the amp to the factory stereo.
Try as much as possible to run these wires in a direction opposite to the power wire for effective functioning. Hide the wire underneath the side panels or car carpet.
Step 4: Pull Out the Stereo
Pull out your stereo to access the connections behind it. Depending on your car model, you would have to pry off a series of plastic clips or loosen some screws before pulling out the stereo. You can read our guide on removing car stereo as well to achieve this.
Step 5: Connect the RCA Cables and Remote Turn-On Wire to the Stereo
The RCA cables usually have red and white plugs while the turn-on wire is blue. Carefully connect the RCA cables to the stereo, ensuring the right terminal connection. Match the cables with their corresponding colors.
If your stereo has multiple red and white outlets, check out for the outlet labeled R/SW. This outlet manages audio outputs in the rear part of your car. The remote turn-on terminal is usually labeled “REM.”
But if your factory stereo doesn’t have the RCA terminals, then you need the RCA inputs for the connection. The RCA inputs can be provided either by using a Hi-low converter or a Line-out converter.
A hi-low converter is smaller but doesn’t allow authentic sound quality from your subwoofer. The line-out converter is bigger and allows the subwoofer to give a fantastic sound. I recommend that you use the line-output converter for the connection.
Step 6: Replace the Stereo
Once you’re done connecting the necessary wires to the stereo, push it back into its place and replace the clips or screws.
Step 7: Connect the Ground Wire
If you’re using a powered subwoofer, then you’re connecting the ground wire to the subwoofer. Otherwise, you are to connect the ground wire to the amp.
The ground wire terminal is usually close to the power wire terminal (sometimes with the remote turn-on terminal in between them).
Connect one end of the ground wire to the negative terminal of your amp or active subwoofer. Tightly secure the other end of the ground wire to the car chassis or base frame using a bolt to close the loop.
If there is paint on this base frame or any other components, scratch or sand off the paint to allow proper grounding.
Connecting the ground wire ensures that the subwoofer functions noiselessly.
Step 8: Wire the Amplifier
You’ve already connected the power wire to the amp in step 2.
Now connect the RCA cables and the turn-on wire to the amp. Be careful to ensure the right terminal connection by matching the colored ports. If you’re using the line-output converter instead, make sure that you follow the right connection.
Step 9: Connect the Subwoofer to the Amp Using the Speaker Wires
Now it’s time to connect your subwoofer to the amp if they’re separate. Make sure that the subwoofer is placed as close as possible to the amp for the best sound quality.
Connecting your subwoofer to the amp (if they’re not one unit) is done using the speaker wires. Look out for the positive (+) and negative (-) terminals on the amp and subwoofer and connect the speaker wires accordingly. The speaker wires are usually red and black.
both devices.
Step 10: Reconnect the Negative Terminal Wire from Your Battery and Test the Subwoofers
Run through all the previous wiring and ensure that they are well-connected. Lastly, reconnect the negative terminal wire from your battery. After that, start your car engine and turn up the factory stereo to test the subwoofer.
If you had connected the wiring correctly, everything should work perfectly as expected. But if you notice any problems, you likely have a faulty connection.
Run a check on the connections again to see if they are rightly connected, including the ground wire. If the RCA cables are not plugged into the right ports, your subwoofer won’t produce the expected sound quality.
Tips for Installing a Subwoofer
1. Always read the user manual of your car and audio equipment before starting any installation process. This will give you an idea of what wires are required and how to properly fit them in.
2. Place the subwoofer as close to the amp (if they’re separate) as possible for the best sound quality.
3. Always thoroughly check all the wires and connections before powering them up to ensure that everything works properly.
4. Ensure that all the screws, clips or bolts are tightly secured so that they don’t come off while driving your car.
5. Avoid using a hi-low converter because it doesn’t allow authentic sound quality from your subwoofer. Instead, use a line-out converter for the connection.
6. Finally, ensure that you know what you are doing. If you are not confident, take a couple of days to get used to these things before you can confidently perform the installation process.
These tips will help you install your subwoofer accurately and safely in no time!
Good luck with your installation project!
Frequently Asked Question
Can I Add a Subwoofer Without an Amp?
Yes, it is possible to add a subwoofer without an amp. However, the power from your factory stereo would be significantly limited, and you wouldn’t get the best sound quality from it. To enjoy excellent sound quality from your subwoofer, we recommend getting a dedicated amplifier along with the subwoofer. This will allow you to adjust the sound quality according to your preferences.
Should I Install A Subwoofer Myself?
Yes, you can install a subwoofer yourself by following the instructions given in this guide. However, if you are not confident enough to handle such installation tasks then it’s best to contact a professional to do it for you. This way, you don’t have to worry about making mistakes and damaging any of your car components.
How Much of a Difference Can I Expect After Subwoofer Installation?
Installing a subwoofer can make a huge difference in the sound quality of your car’s audio system. You can expect to hear deeper bass and much clearer sound with minimal distortion. This will greatly enhance your listening experience, allowing you to enjoy every beat of your music.
However, not all subs are the same and some may perform better than others, while some can disappoint you. So make sure to check out reviews for different subs before making your final purchase.
Conclusion
Connecting your subwoofer to the existing factory stereo is a DIY approachable task. All you need is basic knowledge about car audio and the right materials for the job.
Always ensure that you follow all safety steps in order to prevent damage to your vehicle, such as disconnecting the negative terminal from your battery before starting any wiring procedure. Also, make sure to be careful when removing any side panel as placing them back may become tedious at times.
Lastly, double-check all your connections before and after installation. You don’t want to damage your car audio system due to a wrong wiring connection. With that said, you should be able to connect your subwoofer without needing any professional help. Good luck!