
In today’s modern world, the car radio has become an integral part of our driving experience. Whether we’re jamming to our favorite tunes or catching up on the latest news, a functional and reliable car radio is essential.
However, there are instances when we need to remove the car radio for repairs, upgrades, or even security purposes. This is where having the right tools becomes paramount.

In this comprehensive guide, we will delve into the world of car radio removal tools, exploring their importance, understanding the different types of car radios and their installation methods, and providing step-by-step instructions on using essential tools for a successful removal process.
Understanding Car Radio Removal:
Before diving into the tools themselves, it is crucial to understand the basics of car radio removal. Car radios come in various types and are installed differently, depending on the make and model of the vehicle.
While some radios are secured with screws, others may require specialized removal techniques. Knowing the specific installation method of your car radio will help you determine the appropriate tools needed for its removal.
Furthermore, being aware of common reasons for removing a car radio, such as repairs, upgrades, or theft prevention, will reinforce the importance of having the right tools at your disposal.
Essential Car Radio Removal Tools:
Now that we have a solid foundation, let’s explore the essential car radio removal tools that every car owner should have in their toolkit.
Radio Removal Keys:
Radio removal keys are one of the most common tools used for removing car radios. These keys are specifically designed to fit into the slots or holes located on the sides of the radio unit.
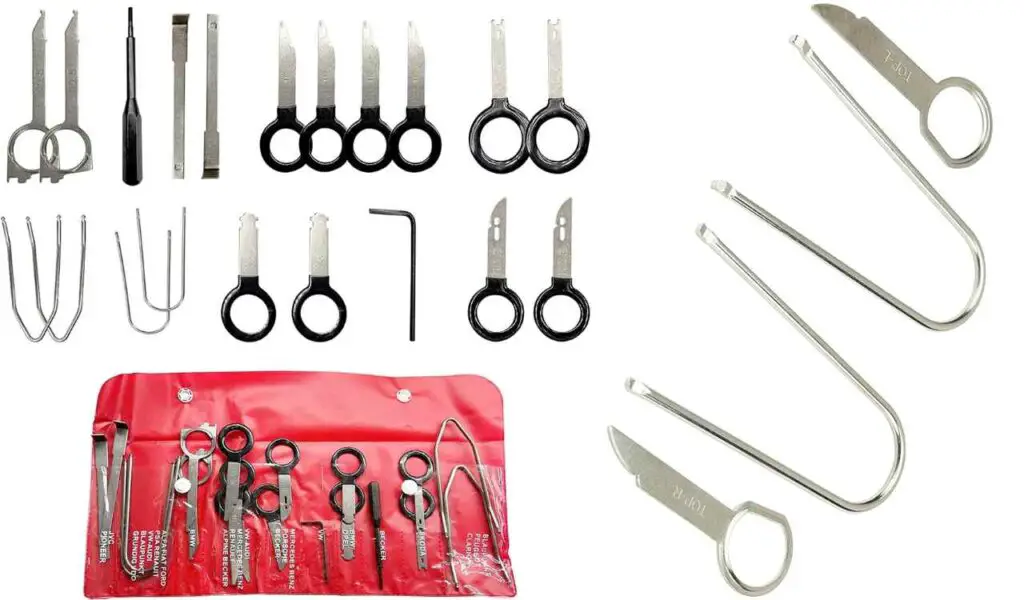
By inserting the keys and applying gentle pressure, the radio can be easily released from its mounting bracket. Radio removal keys come in various shapes and sizes to accommodate different car radio models.
To use radio removal keys, follow these step-by-step instructions:
- Identify the slots or holes on the sides of the radio unit.
- Insert the radio removal keys into the designated slots or holes until you hear a click or feel resistance.
- Gently pull the keys outward, applying equal pressure on both sides.
- The radio should start to release from the mounting bracket.
- Carefully disconnect any wiring harnesses or antenna cables connected to the radio before completely removing them from the dashboard.
Trim Panel Removal Tools:
Trim panel removal tools are invaluable when it comes to removing the surrounding trim or bezel that houses the car radio. These tools are designed to prevent damage to the interior panels while allowing easy access to the radio unit.
Trim panel removal tools come in various shapes and sizes, including pry bars, trim clips, and panel removal pliers.
To use trim panel removal tools, follow these steps:
- Identify the clips or fasteners securing the trim panel around the radio unit.
- Choose the appropriate trim panel removal tool based on the type of fasteners used.
- Insert the tool between the trim panel and the dashboard, applying gentle pressure to release the clips or fasteners.
- Work your way around the trim panel, gradually releasing each clip or fastener.
- Once all the clips or fasteners are released, carefully remove the trim panel, exposing the radio unit.
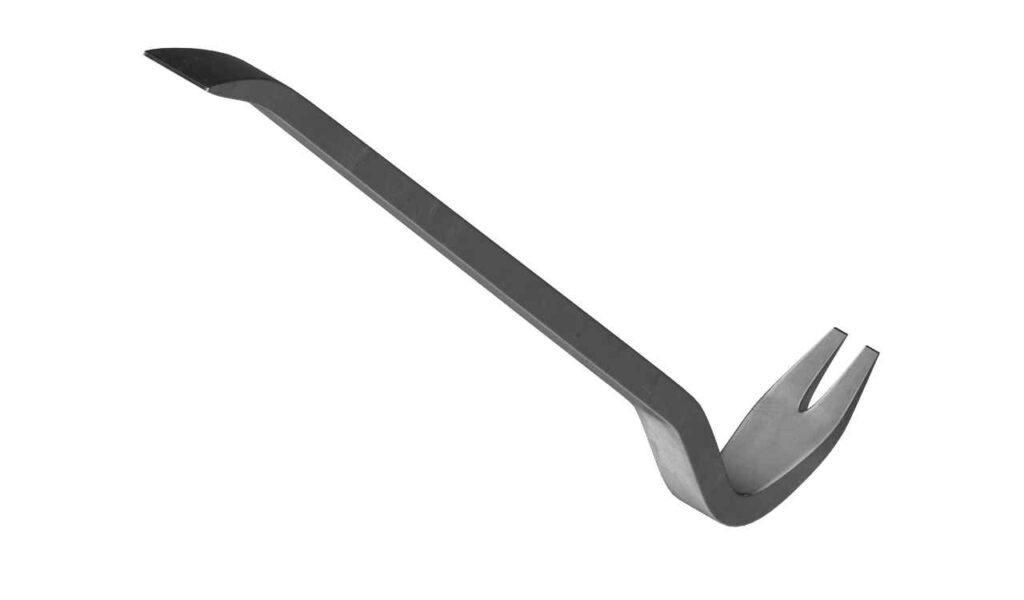
Pry Tools:
Pry tools are versatile instruments commonly used in car radio removal. These tools are designed to safely pry open panels, remove trim pieces, and disconnect connectors.
Pry tools come in various shapes and sizes, including flat pry bars, wedge-shaped tools, and hook tools.
To use pry tools effectively, follow these guidelines:
- Identify the areas where the radio unit is secured or connected to other components.
- Choose the appropriate pry tool based on the specific task at hand.
- Insert the pry tool between the trim panel or component and apply gentle pressure to create a gap.
- Gradually and carefully pry open the panel or trim piece, using the tool as leverage.
- Be cautious and mindful of any wiring harnesses or connectors attached to the panel, as excessive force can cause damage.
- Once the panel or trim piece is sufficiently pried open, proceed with disconnecting any connectors or securing screws to fully remove the radio unit.
Screwdrivers:
Screwdrivers are essential tools in any car radio removal toolkit. They are used to remove screws that secure the radio unit to the mounting bracket or any additional components.
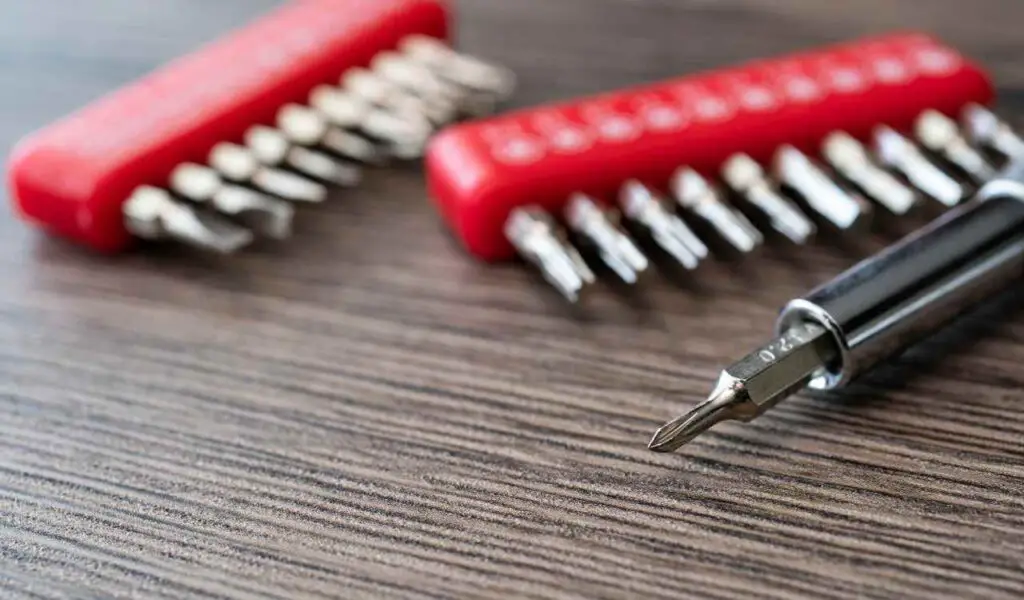
Different car radios may require different types and sizes of screwdrivers, such as Phillips head or flathead screwdrivers.
To use screwdrivers for radio removal, follow these steps:
- Identify the screws securing the radio unit to the mounting bracket or other components.
- Select the appropriate screwdriver based on the screw type and size.
- Insert the screwdriver into the screw head and turn it counterclockwise to loosen and remove the screws.
- Keep track of the screws and store them safely to ensure they can be easily reinstalled when necessary.
- Once all the screws are removed, gently disconnect any wiring harnesses or antenna cables before lifting the radio unit from the dashboard.
Electrical Connector Tools:
Electrical connector tools are specifically designed to safely disconnect wiring harnesses and connectors without causing damage or undue stress.
These tools come in various forms, such as connector release tools or terminal removal tools, depending on the type of connectors used in the car radio and its wiring system.
To safely disconnect electrical connectors, follow these steps:
- Identify the connectors attached to the radio unit, such as wiring harnesses or antenna cables.
- Select the appropriate electrical connector tool based on the connector type.
- Insert the tool into the connector, applying gentle pressure to release the locking mechanism.
- Simultaneously, carefully pull or wiggle the connector to detach it from the radio unit.
- Repeat the process for all the necessary connectors until they are completely disconnected from the radio unit.
Magnetic Pickup Tool:
A magnetic pickup tool can be incredibly handy during car radio removal, especially when dealing with small screws or other metal components that may accidentally fall into tight spaces.
The tool consists of a telescoping magnetic rod that allows you to retrieve dropped or hard-to-reach metallic items.
To utilize the magnetic pickup tool effectively, follow these tips:
- Extend the magnetic rod of the pickup tool to the desired length.
- Move the tool near the area where a screw or metal component may have fallen.
- Allow the magnet at the end of the rod to attract and securely hold the metal item.
- Slowly retract the rod, ensuring the item remains attached to the magnet.
- Carefully remove the retrieved item from the magnetic pickup tool and place it in a safe location.
Additional Tips and Considerations:
As you embark on your car radio removal journey, it is important to keep the following tips and considerations in mind:
Safety Precautions:
Always prioritize safety during the removal process. Disconnect the vehicle’s battery to avoid electrical mishaps, wear protective gloves to prevent injuries, and be mindful of sharp edges or fragile components.
Troubleshooting Common Challenges:
If you encounter any difficulties during the removal process, consult the vehicle’s manual or seek professional assistance. It’s better to address any challenges promptly rather than risk damaging the radio or surrounding components.
Cleaning and Maintaining Tools:
Regularly clean and maintain your car radio removal tools to ensure their longevity and optimal performance. Remove any debris or grime, lubricate moving parts if necessary, and store them in a safe and organized manner for easy access.
Where to Purchase Car Radio Removal Tools:
Car radio removal tools can be found at various locations, both online and offline. Here are a few places where you can purchase these essential tools:
Automotive Supply Stores:
Visit your local automotive supply store or car accessory shop. These stores often carry a wide range of tools specifically designed for car maintenance and repairs. Ask the store staff for assistance in locating the car radio removal tools you need.
Online Retailers:
Explore reputable online retailers that specialize in automotive tools and accessories. Websites such as Amazon, eBay, and specialized automotive tool stores offer a vast selection of car radio removal tools, making it convenient to browse and purchase from the comfort of your own home.
Manufacturer Websites:
Check the websites of car radio manufacturers. They may offer specialized tools and accessories that are compatible with their specific radio models. This ensures a precise fit and makes the removal process smoother.
Auction Websites and Classifieds:
Consider browsing auction websites or online classified platforms. Sometimes, individuals may sell their used car radio removal tools at a discounted price. Just be sure to verify the condition and authenticity of the tools before making a purchase.
Conclusion:
With the right tools in hand, removing a car radio becomes a manageable task. In this comprehensive guide, we’ve explored the importance of car radio removal tools, discussed the various types of car radios and their installation methods, and provided step-by-step instructions on using essential tools for a successful removal process.
Remember to familiarize yourself with the specific installation method of your car radio and select the appropriate tools accordingly. Take your time, exercise caution, and refer to the vehicle’s manual or seek professional assistance whenever necessary.
By equipping yourself with the essential car radio removal tools and following the guidelines outlined in this guide, you can confidently embark on your car radio removal journey, whether it’s for repairs, upgrades, or even security purposes. Happy removing!