
A blown subwoofer coil can be a frustrating problem, especially for those who enjoy loud music. A blown subwoofer coil can result in a lack of sound, distorted sound, or even physical damage to the subwoofer cone.
In this article, we’ll discuss what causes a blown subwoofer coil and how to fix a blown subwoofer coil. This guide will help you to get your subwoofer back in working order.
Symptoms of a Blown Subwoofer Coil:
One of the most common symptoms of a blown subwoofer coil is a lack of sound or low volume. This can be caused by a break in the voice coil, which is the part of the subwoofer that produces the sound.
Another common symptom is distorted sound, which can result from a misaligned voice coil or a loose connection within the subwoofer. Rumbling or crackling noises, as well as physical damage to the subwoofer cone, can also indicate a blown subwoofer coil.
What Causes a Blown Subwoofer Coil:
There are several factors that can contribute to a blown subwoofer coil. Overloading the subwoofer, either by playing music too loudly or by using the wrong type of subwoofer for the application, can cause the voice coil to overheat and eventually fail.
Poor quality subwoofers are also more likely to blow out due to manufacturing defects or subpar materials. Exposure to extreme temperatures, such as leaving a subwoofer in a hot car, can also lead to a blown subwoofer coil.
Finally, age and wear and tear can cause the subwoofer to deteriorate over time, leading to a blown coil.
How To Fix A Blown Subwoofer Coil?
Tools and Materials Needed:
To fix a blown subwoofer coil, you’ll need a few basic tools and materials. These include
- Screwdrivers
- Wire cutters
- Speaker repair glue
- A replacement subwoofer voice coil, and
- An electrical tape.
Make sure that you have all of these items on hand before you begin the repair process.
Step-by-Step Guide to Fix a Blown Subwoofer Coil:
Remove the subwoofer from the system:
Before you begin the repair process, you’ll need to remove the subwoofer from the system. This typically involves removing the screws that secure the subwoofer in place and disconnecting any wires that are attached to it.
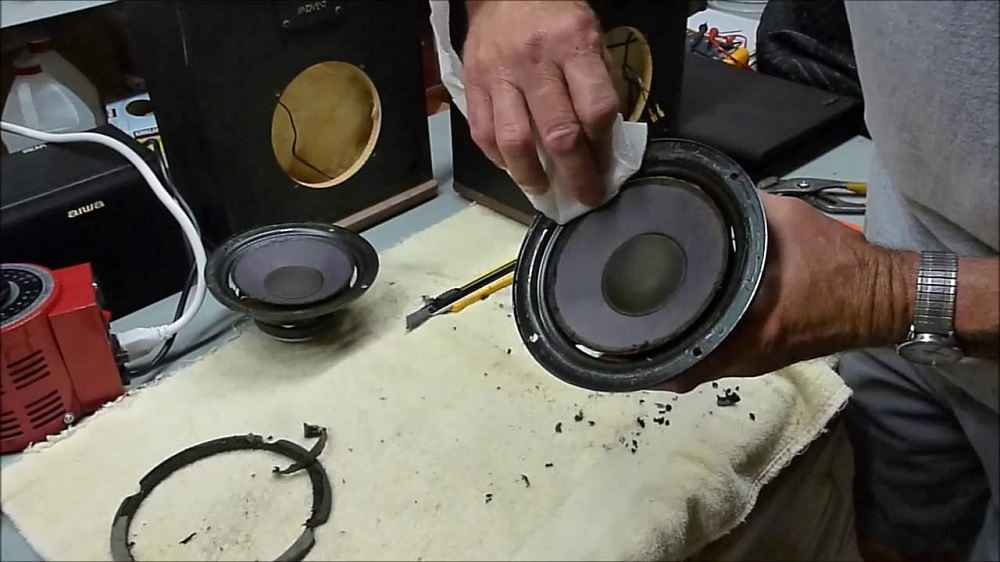
Disassemble the subwoofer:
Once you have removed the subwoofer from the system, you’ll need to disassemble it to access the voice coil. This may involve removing the subwoofer cone and the surrounding gasket, as well as any screws or clips that hold the subwoofer in place.
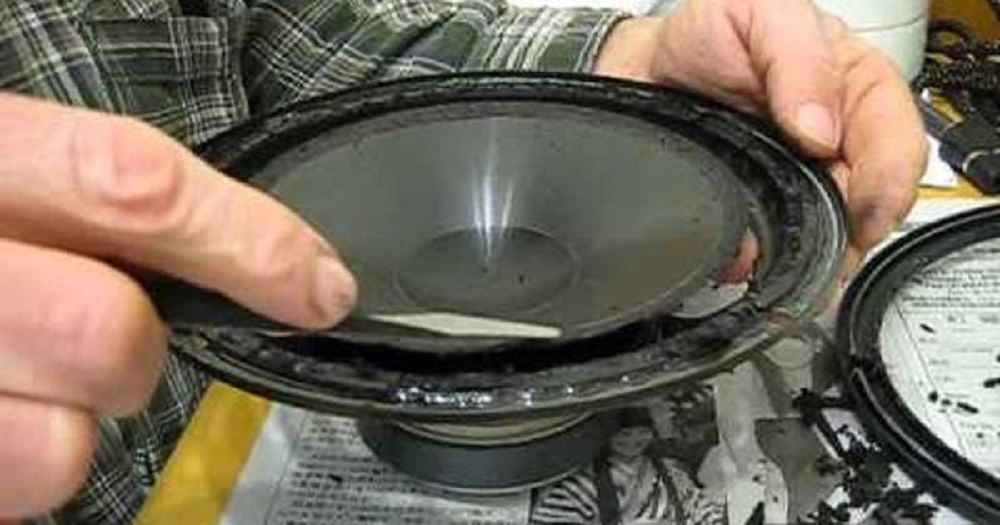
Locate the damaged coil:
The next step is to locate the damaged coil. This is typically located near the center of the subwoofer, and you should be able to see if it is damaged by looking for any breaks or frays in the wire.
Remove the damaged coil:
Once you’ve located the damaged coil, you’ll need to remove it. This typically involves carefully cutting the wires that connect the coil to the rest of the subwoofer and then carefully removing the coil from the subwoofer frame.
Replace the damaged coil:
With the damaged coil removed, you can now install the replacement coil. This typically involves carefully attaching the new coil to the subwoofer frame and connecting the wires to the appropriate terminals.
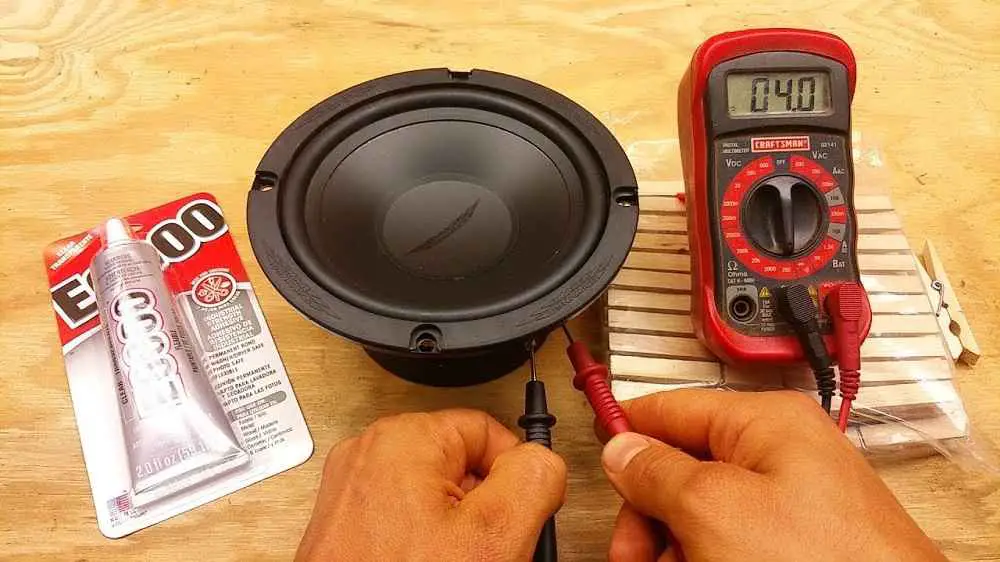
Make sure to use speaker repair glue to secure the coil in place.
Reassemble the subwoofer:
With the replacement coil installed, you can now reassemble the subwoofer. This typically involves reattaching the subwoofer cone and gasket, as well as any screws or clips that hold the subwoofer in place.
Test the subwoofer:
Finally, you can test the subwoofer to make sure it is working properly. Connect it back to the system and play some music to see if it produces sound.
If it does, then your repair was successful. If it doesn’t, then you may need to repeat the repair process or seek professional help.
Precautions and Safety Measures
It is important to take the necessary precautions and safety measures when fixing a blown subwoofer coil.
Make sure to disconnect the power source before you begin the repair process to avoid the risk of an electric shock.
Handle the subwoofer carefully to avoid further damage, and wear protective gear, such as gloves and eye protection, to protect yourself from any sharp edges or flying debris. Finally, follow the instructions listed above carefully to avoid damaging your subwoofer further.
Conclusion
Fixing a blown subwoofer coil can seem like a daunting task, but with the right tools and some patience, it can be done.
By following the steps outlined in this article, you’ll be able to get your subwoofer back in working order and enjoy the full sound of your music once again.
It is important to note that proper maintenance of the subwoofer is crucial in avoiding future issues, so make sure to keep it in good condition and seek professional help if necessary.
What tools do I need to fix a blown subwoofer coil?
You will need a few basic tools for fixing a blown subwoofer coil, such as screwdrivers, wire cutters, and speaker repair glue. You may also want to invest in a multimeter to test the subwoofer and ensure that the repair was successful.
Can I fix a blown subwoofer coil if I don’t have any experience in car audio repair?
With a little patience and by following the steps outlined in the article, you can DIY fix a blown subwoofer coil, even if you don’t have any prior experience.
However, it is important to proceed with caution and seek professional help if you are unsure of any step in the process.
What are the signs of a blown subwoofer coil?
A blown subwoofer coil is typically indicated by a lack of sound from the subwoofer or by a distortion in the sound. You may also notice a burning smell coming from the subwoofer, which is a strong indication that the coil is damaged.
How do I determine the size of the replacement coil I need for my subwoofer?
The size of the replacement coil you need for your subwoofer can typically be found in the owner’s manual or on the manufacturer’s website.
You can also measure the diameter of the damaged coil and compare it with the replacement coils available for purchase. We recommend that you go along with the blown coil when purchasing the replacement coil.
Is it safe to use speaker repair glue on a subwoofer coil?
Yes, it is safe to use speaker repair glue on a subwoofer coil. This type of glue is specifically designed for use in speaker repair and will not harm the subwoofer or interfere with the sound quality.
However, make sure to follow the manufacturer’s instructions carefully and use only the recommended amount of glue to avoid any damage to the subwoofer.