
Reconing a car subwoofer is an important task that can help prolong the life of your subwoofer and improve its sound quality.
The process involves removing the old cone and surround, installing new ones, and fine-tuning the subwoofer for optimal performance.
In this article, we will provide a detailed and comprehensive guide on how to recone a car subwoofer.
Before we begin, it’s important to note that reconing a subwoofer is a complex and skill-dependent task.
It is not recommended for those who have no experience with subwoofer repair, or who are not comfortable working with electrical components. It is also important to be familiar with the safety precautions and guidelines before attempting any subwoofer repair.
Now, let’s move on to the tools and materials needed for the job.
Tools and materials needed:
- Screwdrivers
- Soldering iron
- Glue gun
- Replacement cone and surround
- Voice coil
- Knife or scissors
These tools and materials can be purchased at most electronics or car audio stores.
It’s important to make sure that you are purchasing the correct size cone and surround for your specific subwoofer model.
The cost of the tools and materials will vary, but you can expect to spend around $50-$100.
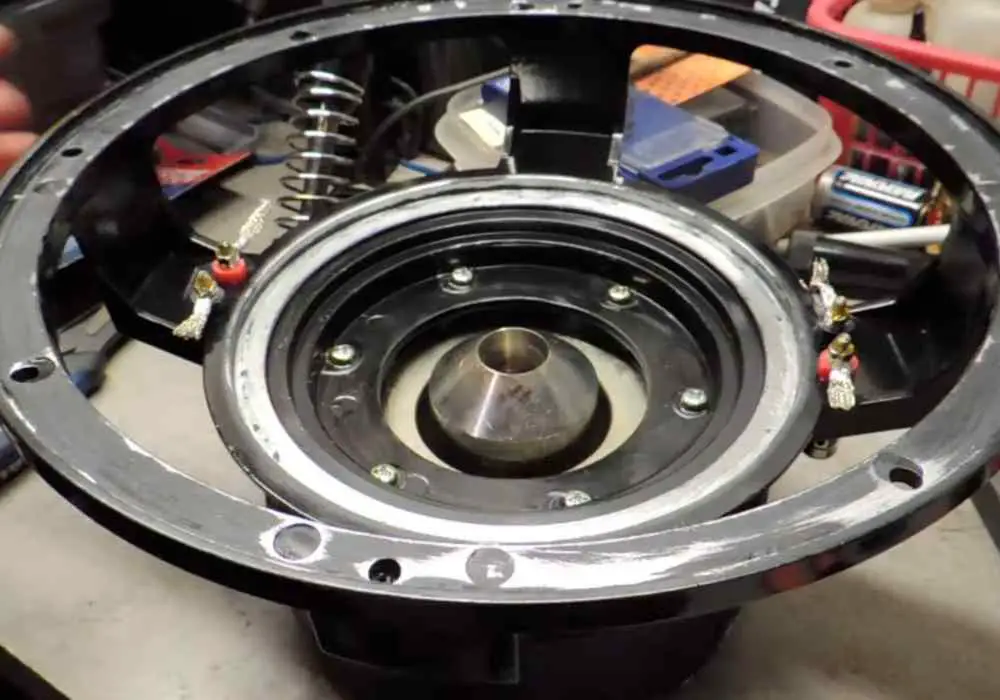
Disassemble the Subwoofer
The next step is disassembling the subwoofer.
Removing the old cone:
Begin by removing the screws that hold the subwoofer’s grille in place.
Once the grille is removed, you should be able to see the subwoofer’s cone and surround.
Use a screwdriver to remove any additional screws that are holding the cone and surround in place. Carefully remove the cone and set it aside.
Removing the old surround:
The surround is the ring that surrounds the cone. Carefully peel the surround off the cone. If the surround is stuck, use a knife or scissors to gently cut it off.
Removing the voice coil:
The voice coil is located at the center of the cone and is responsible for moving the cone back and forth to produce sound.
Use a screwdriver to remove the screws that hold the voice coil in place. Carefully remove the voice coil and set it aside.
Preparing the New Cone and Surround
Once the subwoofer is disassembled, you can begin preparing the new cone and surround.
Measuring and cutting the new cone and surround:
Measure the diameter of the subwoofer’s frame to ensure that the new cone and surround are the correct size.
Cut the new cone and surround to the correct size using a knife or scissors.
Gluing the new surround to the new cone:
Use a glue gun to apply a thin layer of glue to the edge of the new cone.
Carefully place the new surround onto the cone, making sure that it is centered and straight. Use a clamp or heavy object to hold the surround in place while the glue dries.
Allowing the glue to dry:
Allow the glue to dry for at least 24 hours before proceeding.
Once the new cone and surround are prepared, you can begin installing them onto the subwoofer frame.
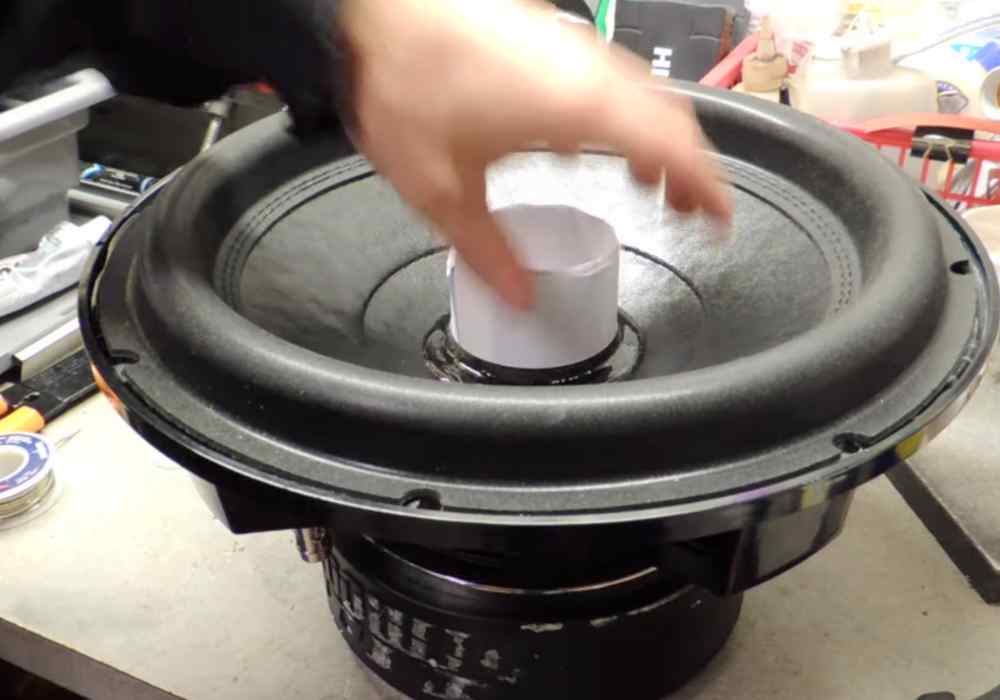
Install the Cone and Surround to the Subwoofer
Now that the new cone and surround are prepared, it’s time to install them onto the subwoofer frame.
Installing the new cone and surround onto the subwoofer frame:
Carefully place the new cone and surround onto the subwoofer frame.
Make sure that the cone is centered and straight. Use screws to secure the new cone and surround in place.
Installing the new voice coil:
Reinstall the new voice coil onto the center of the new cone. Make sure that the voice coil is centered and straight.
Use screws to secure the voice coil in place.
Once the new cone and surround and voice coil are installed, it’s time to test and fine-tune the subwoofer for optimal performance.
Testing the subwoofer’s sound quality:
Connect the subwoofer to an amplifier and play music through it.
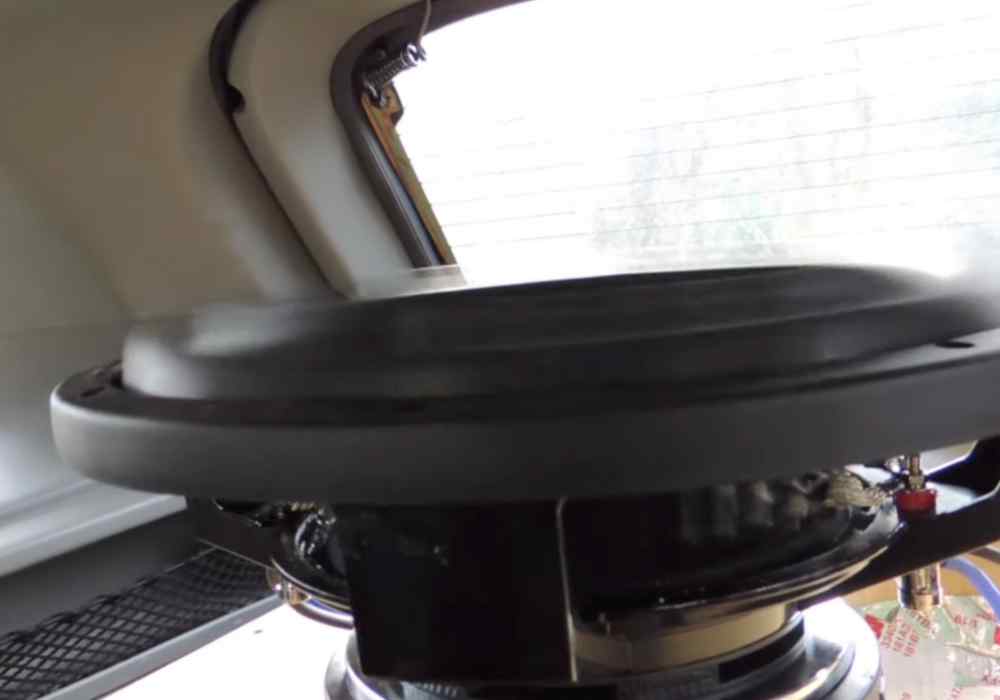
Listen for any distortion or unusual sounds. If everything sounds good, proceed to the next step.
Adjusting the subwoofer’s settings for optimal performance:
Adjust the subwoofer’s settings on the amplifier to achieve the desired sound quality.
This may include adjusting the volume, crossover frequency, and bass boost.
Troubleshooting common issues:
If you encounter any issues while testing the subwoofer, refer to the subwoofer’s manual or contact the manufacturer for troubleshooting advice.
Common issues include distortion, lack of bass, and rattling sounds.
Conclusion
In conclusion, reconing a car subwoofer is an important task that can help prolong the life of your subwoofer and improve its sound quality.
The process involves removing the old cone and surround, installing new ones, and fine-tuning the subwoofer for optimal performance.
Remember, reconing a subwoofer is a complex task that requires patience and attention to detail. Take your time and be sure to follow the instructions carefully. Additionally, regular maintenance on your subwoofer is important to keep it in good condition.
Don’t hesitate to seek help or advice if you have any doubts or queries.
Can I recone my subwoofer if it has been damaged by water or other liquids?
It is not recommended to attempt reconing a subwoofer that has been damaged by water or other liquids.
The water or liquid can cause damage to the voice coil and other internal components, making reconing ineffective.
In this case, it is best to replace the subwoofer.
Can I recone my subwoofer if the cone is only slightly damaged?
If the cone is only slightly damaged, it may be possible to recone the subwoofer.
However, if the damage is significant or affects the overall structural integrity of the cone, it is best to replace the subwoofer.
Can I recone a subwoofer myself or do I need to take it to a professional?
Reconing a subwoofer is a complex and skill-dependent task. If you have experience with subwoofer repair and are comfortable working with electrical components, you may be able to recone the subwoofer yourself.
However, if you are not confident in your abilities, it is best to take the subwoofer to a professional for repair.
Can I use any type of glue to attach the new surround to the new cone?
It is important to use the correct type of glue for attaching the new surround to the new cone.
A strong adhesive, such as a rubber-based glue, is recommended for this task.
Can I use a different size cone or surround than the one that came with my subwoofer?
It is important to use the correct size cone and surround for your specific subwoofer model.
Using a different size cone or surround may affect the subwoofer’s performance and may even damage the subwoofer.
It’s important to measure the diameter of the subwoofer’s frame to ensure that the new cone and surround are the correct size.