
The purpose of this article is to provide a detailed and comprehensive guide on how to test a subwoofer with a multimeter. A subwoofer is an essential component in any audio system, responsible for producing low-frequency sounds, such as bass and drums.
By testing a subwoofer with a multimeter, you can ensure that it is functioning properly and producing high-quality audio.
What is a Subwoofer and Why is it Important?
A subwoofer is a speaker that is specifically designed to produce low-frequency sounds, such as bass and drums. These sounds are often referred to as the “heartbeat” of music, and are critical to the overall audio quality of a system.
Subwoofers are typically larger and more powerful than other speakers, allowing them to produce low-frequency sounds with greater clarity and volume.
What is a Multimeter and Why is it Used for Testing Subwoofers?
A multimeter is a device used to measure electrical properties, such as voltage, current, and resistance. It is an essential tool for testing subwoofers because it allows you to accurately measure the electrical properties of the subwoofer’s components.
By using a multimeter, you can determine if a subwoofer is functioning properly and producing high-quality audio.
How to Test a Subwoofer with a Multimeter
Preparing for the Test
Before you begin testing your subwoofer with a multimeter, you will need to gather a few tools and equipment. You will need a multimeter, a screwdriver, and a set of speaker wires.
You will also need to check the wiring of the subwoofer to ensure that it is properly connected.
Testing the Subwoofer
The first step in testing a subwoofer with a multimeter is to test for continuity of the subwoofer’s voice coil. The voice coil is the component in the subwoofer that converts electrical energy into mechanical energy, which produces sound.
To test for continuity, set your multimeter to the continuity setting and touch one probe to one end of the voice coil and the other probe to the other end. If the multimeter beeps, this indicates that there is continuity and the voice coil is functioning properly.
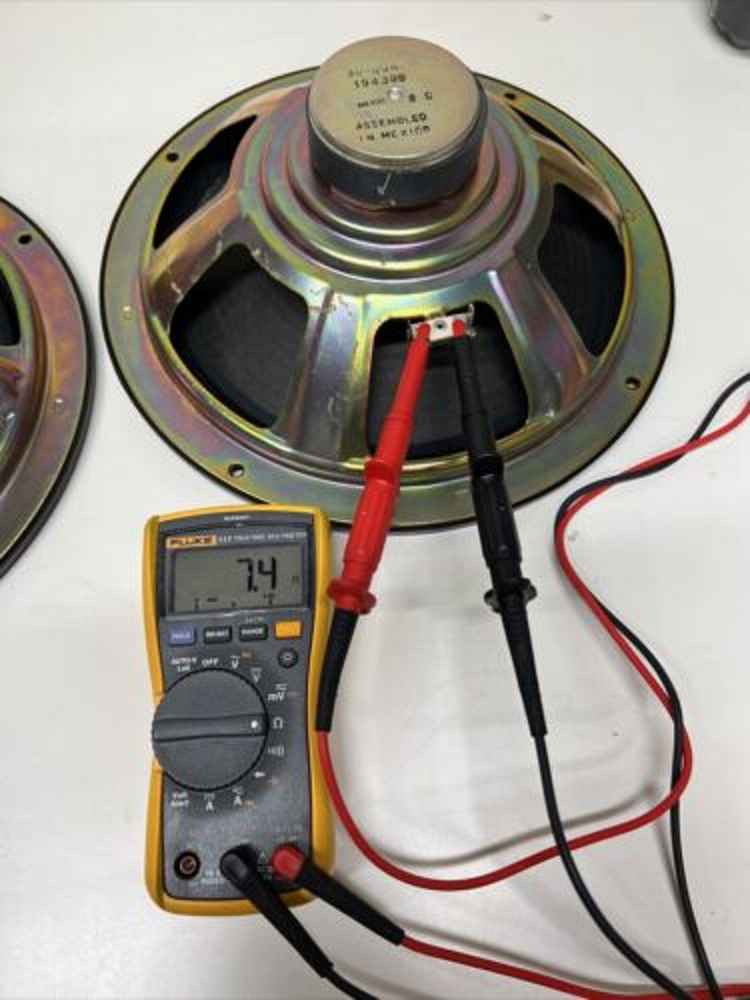
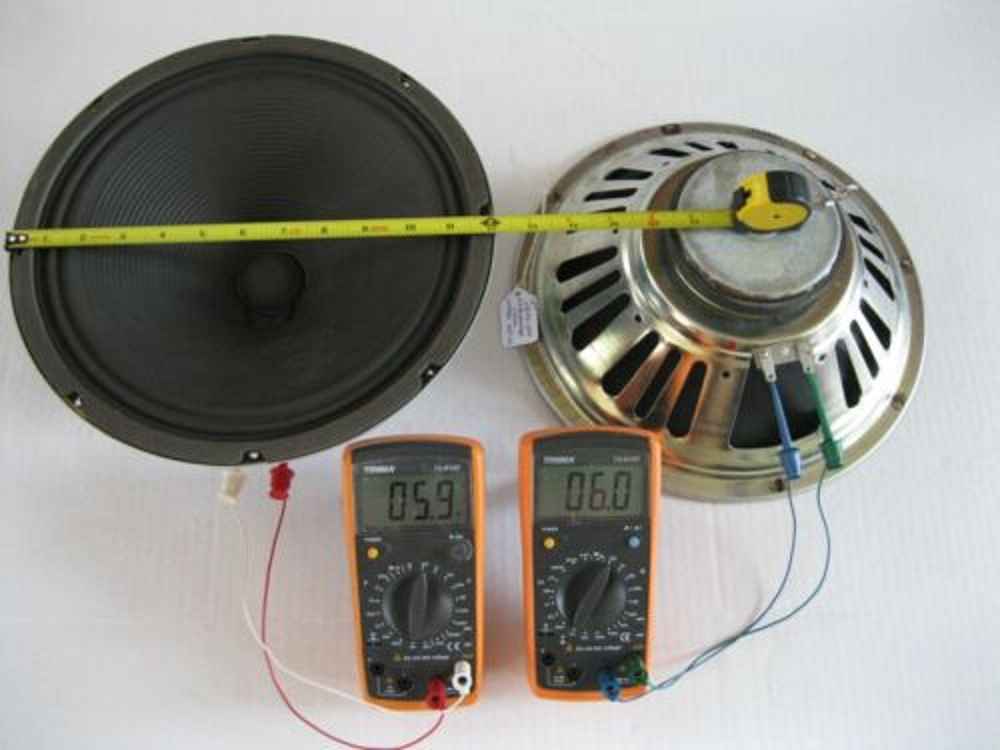
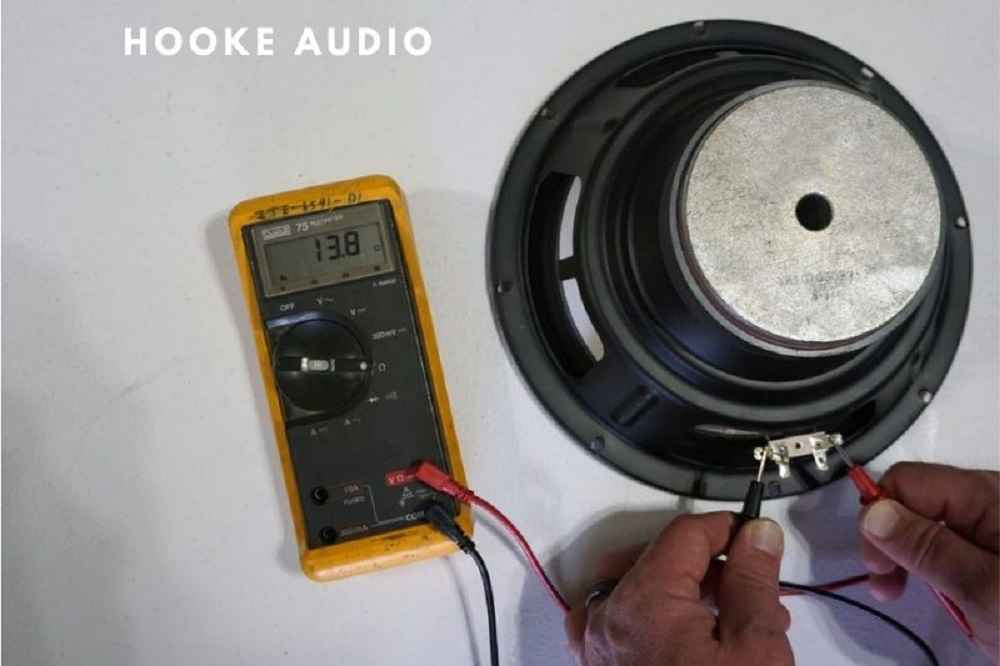
The next step is to test the subwoofer’s resistance. Resistance is a measure of the subwoofer’s ability to resist the flow of electrical current.
To test resistance, set your multimeter to the resistance setting and touch one probe to one end of the voice coil and the other probe to the other end. The multimeter will display the resistance reading in ohms.
Finally, you will test the subwoofer’s DC resistance. DC resistance is a measure of the subwoofer’s resistance to a direct current.
To test DC resistance, set your multimeter to the DC resistance setting and touch one probe to one end of the voice coil and the other probe to the other end. The multimeter will display the DC resistance reading in ohms.
Interpreting the Results
Once you have completed the tests, it is important to understand the normal values for subwoofer testing and be able to interpret the results.
The resistance reading should be within a range of 4 to 8 ohms, while the DC resistance reading should be very close to the resistance reading. If the resistance reading is significantly higher or lower than the normal range, this could indicate a problem with the voice coil.
Another common issue in subwoofer testing is an open circuit, which is indicated by an infinite resistance reading on the multimeter. An open circuit means that there is a break in the circuit, preventing the flow of electrical current.
This can be caused by a number of factors, such as a damaged voice coil or a loose connection.
Identifying and Interpreting Common Issues in Subwoofer Testing
There are several common issues that can arise during subwoofer testing, including open circuits, short circuits, and blown voice coils. An open circuit can be caused by a break in the circuit, such as a damaged voice coil or a loose connection.
A short circuit occurs when the positive and negative wires touch, causing an excessive flow of electrical current. A blown voice coil is indicated by a sudden increase in resistance or a complete lack of continuity.
Conclusion
In conclusion, testing a subwoofer with a multimeter is a crucial step in ensuring that your audio system is functioning properly and producing high-quality sound.
By following the steps outlined in this article, you can effectively test your subwoofer and identify any issues that may be affecting its performance.
Regularly testing your subwoofer is essential to maintaining the health of your audio system and ensuring that you always enjoy the best possible sound quality.
Can I use any type of multimeter to test my subwoofer?
Yes, you can use any type of multimeter, but it is important to make sure it is capable of measuring resistance (ohms) and DC resistance.
Can I test a subwoofer with a multimeter if it is still connected to my audio system?
No, it is recommended to disconnect the subwoofer from the audio system before testing it. This will help you to avoid any potential damage and also achieve an accurate result.
What should I do if my multimeter shows an infinite resistance reading during the test?
An infinite resistance reading indicates an open circuit, which means there is a break in the circuit that is preventing the flow of electrical current. This could be caused by a damaged voice coil or a loose connection and should be addressed by a professional.
What does a short circuit mean in subwoofer testing and how can it be resolved?
A short circuit occurs when the positive and negative wires touch, causing an excessive flow of electrical current. This can cause damage to the subwoofer and should be addressed by a professional.
Can I test my subwoofer’s output and volume with a multimeter?
No, a multimeter is not designed to measure the output and volume of a subwoofer. These measurements can be performed using specialized audio testing equipment.